Achieving true independence with a mobility scooter isn’t about collecting aids, but about designing an integrated home safety system that anticipates real-world failures.
- This involves creating dedicated ‘transfer zones’ to prevent falls and implementing strict fire safety protocols for battery charging.
- It also means choosing storage resilient to British damp and ensuring emergency services can always access your home.
Recommendation: Think like a therapist: audit your home for ‘points of failure’ before purchasing any equipment.
Bringing a mobility scooter into your life is a significant step towards reclaiming independence. The initial focus is often on the scooter itself—its range, its comfort, its speed. However, the real test of freedom begins at your own front door. Many people simply look for a few standalone aids, like a basic ramp or a cover, believing this will suffice. This approach often overlooks the interconnected challenges of daily life, especially within the unique constraints of UK homes, from narrow Victorian doorways to the pervasive damp climate.
As an Occupational Therapist, I see the costly and sometimes dangerous consequences of this piecemeal approach. True, lasting independence doesn’t come from a collection of gadgets. It comes from creating a series of integrated safety systems throughout your home and vehicle. This is a shift in mindset: instead of just buying an « aid, » you are designing a « system » that anticipates points of failure—a fall during a transfer, a battery fire, or being unable to let emergency responders in.
This holistic perspective means looking at your environment as a whole. It involves understanding not just the width of your hallway, but its dynamic turning circle. It means planning for how you will get from your scooter to your favourite armchair safely, every single time, especially if you live alone. It’s about protecting your significant investment from the elements and ensuring your charging routine doesn’t pose a risk to you or your neighbours. This guide will walk you through building these essential home systems, transforming your home from a series of obstacles into a seamless environment for independent living.
To help you navigate these crucial considerations, this article is structured to address each key ‘system’ required for total scooter integration. Below is a summary of the areas we will explore to ensure your home is a safe and enabling space.
Summary: A Holistic Guide to Scooter-Proofing Your Home
- How to Choose the Right Ramp Gradient for Victorian Terrace Doorways?
- Scooter to Chair Transfers: How to Avoid Falls When You Live Alone?
- Metal Shed or Brick Outbuilding: Which Protects Better Against British Damp?
- The Fire Safety Error of Charging in Communal Corridors
- Why Installing a Key Safe Is Crucial for Scooter Users Living Alone?
- How to Measure Your Hallway or Shed Before Buying a Scooter?
- Saving Space: Why Under-Floor Lifts Are Better for Family Trips?
- Car Hoists for Scooters: How to Lift 100kg Without Breaking Your Back?
How to Choose the Right Ramp Gradient for Victorian Terrace Doorways?
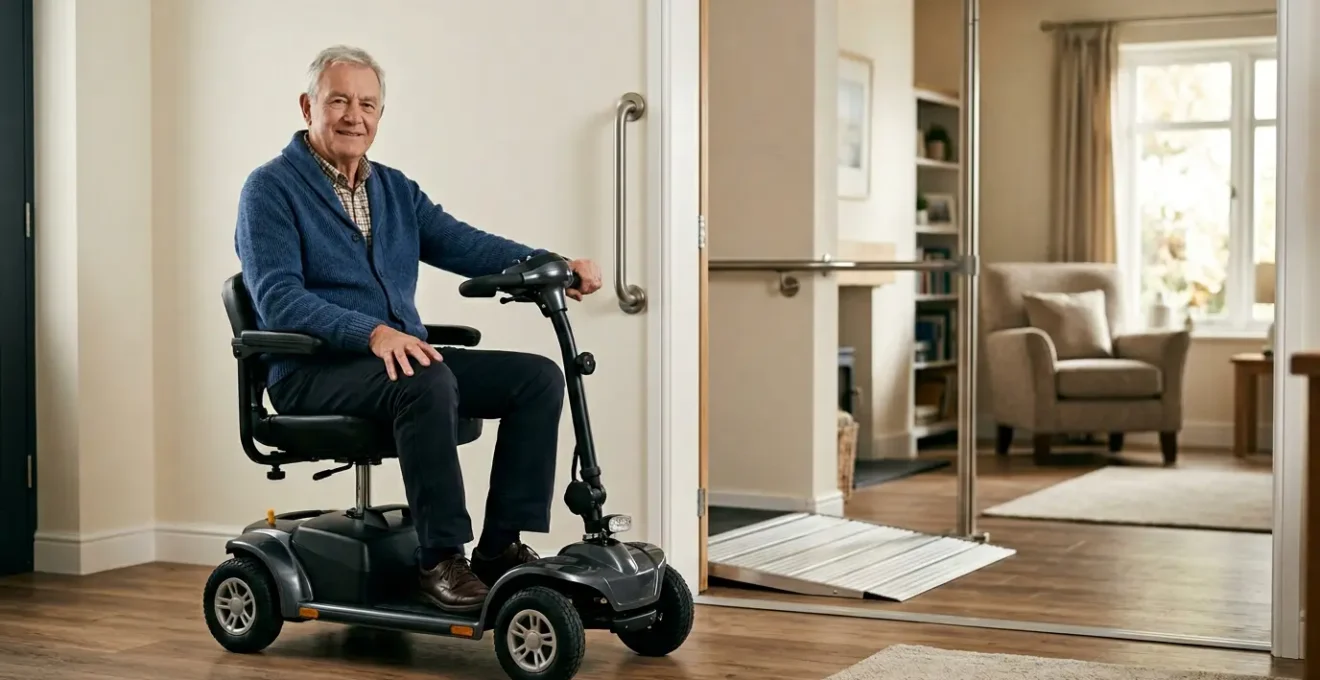
The first barrier to independence is often the front doorstep. For owners of older UK properties, especially Victorian terraces with narrow entrances and steep steps, simply buying a standard ramp can lead to frustration. The critical factor is the gradient. While public accessibility standards provide a baseline, they don’t always account for the tight spaces of a private residence. For example, a commonly cited guideline is a 1:12 slope ratio (an 8.33% gradient), meaning for every inch of height, you need twelve inches of ramp length. A 6-inch step would require a 6-foot ramp.
In a constrained Victorian hallway or small front garden, a ramp this long may be impossible to accommodate. Furthermore, a steeper ramp (e.g., 1:8 or 1:6), while shorter, may be too difficult for a less powerful scooter to climb or too dangerous to descend without assistance. The key is to find a balance between a manageable gradient and the physical space available. This includes not just the ramp itself, but also the level landing space at the top. You need enough room to open the door and manoeuvre the scooter without risking rolling backwards. A minimum clear space of 60×60 inches at the top is recommended for safe turning.
Before committing to a purchase, you must audit the space meticulously. This goes beyond simple measurements and involves simulating the entire entry and exit process. Thinking of your ramp as an ‘entry system’ rather than just an object will prevent costly errors and ensure safe, reliable access.
Action Plan: Auditing Your Doorway for a Ramp
- Measure the Rise: Accurately measure the total vertical height from the ground to the top of your door threshold. This is your starting point for all calculations.
- Calculate Ideal Length: Use the 1:12 ratio (1 inch rise = 12 inches length) to determine the ideal, safest ramp length. Acknowledge this may need to be compromised.
- Simulate the Footprint: Use cardboard or painter’s tape to mark out the full length and width of the proposed ramp on the ground. Does it block a public path or fit in your garden?
- Verify the Landing Zone: Ensure you have at least a 60×60 inch clear, level area at the top of the ramp. Can you open your door fully while the scooter is on this landing?
- Plan the Transition: Check that the ramp includes smooth transition plates at the top and bottom to prevent the scooter’s small wheels from getting caught on an abrupt edge.
Scooter to Chair Transfers: How to Avoid Falls When You Live Alone?
Once you are safely inside, the next major point of failure is the transfer—the moment you move from your scooter to an armchair, bed, or toilet. For individuals living alone, a fall during a transfer can be catastrophic, potentially leaving you unable to get up or call for help. This is not a moment for improvisation; it requires a dedicated and well-designed Transfer Zone. This is a designated area in your home where the environment is specifically set up to make transfers as safe and effortless as possible.
The core principle of a Transfer Zone is to minimise gaps, unstable surfaces, and the need for strenuous lifting or twisting. It involves positioning your target seat (e.g., armchair) at the same height as your scooter seat to allow for a level, sliding motion rather than a lift-and-drop. The flooring in this zone must be non-slip, and there should be no loose rugs or cables that could cause a trip.
To create a robust system, you should add dedicated support aids within this zone. This moves beyond relying on standard furniture, which can tip or slide. The goal is to create a stable, predictable environment for every transfer. This illustration shows how specific equipment can be combined to create a highly secure transfer system.

As you can see, the system relies on purpose-built equipment. A transfer board bridges the gap between the scooter and the chair, providing a smooth surface to slide across. A floor-to-ceiling security pole offers a stable, secure handhold to assist with steadying and pulling yourself across, which is far safer than relying on the arm of a chair. These elements, when combined, create an integrated safety system that dramatically reduces the risk of falls.
Metal Shed or Brick Outbuilding: Which Protects Better Against British Damp?
A mobility scooter is a significant investment, and protecting it from the elements is paramount. The British climate, with its high humidity and fluctuating temperatures, makes damp a primary enemy. Storing a scooter under a simple tarpaulin is insufficient, as it traps moisture and can lead to corrosion of electrical components and battery degradation. The two main secure options are a purpose-built metal shed or a more permanent brick outbuilding. The choice between them requires an assessment of environmental resilience—how well the structure protects against damp, temperature extremes, and theft.
A common misconception is that a sealed unit is best. However, as documented by mobility suppliers, preventing condensation is key. This happens when warm, moist air meets the cold metal of your scooter, causing water to form on critical parts. Therefore, active ventilation is non-negotiable in any storage solution. Brick outbuildings are naturally more breathable and offer superior thermal insulation, keeping the scooter at a more stable temperature and protecting the battery’s chemistry from extreme cold or heat. Modern, high-quality metal sheds designed for mobility scooters also incorporate ventilation systems to manage airflow.
However, the differences in security, fire resistance, and cost are substantial. A brick structure is inherently more secure and fire-resistant, which is a vital consideration given the risk of lithium-ion battery fires. The following table, based on an analysis of specialized mobility scooter storage, breaks down the key differences to help you make an informed decision.
| Feature | Metal Shed (PVC-coated galvanized steel) | Brick Outbuilding |
|---|---|---|
| Damp & Condensation Control | Built-in ventilation systems prevent condensation buildup; requires active airflow management | Naturally breathable masonry walls; better passive humidity regulation but can retain moisture without ventilation |
| Temperature Insulation | Poor thermal insulation; subject to extreme temperature swings affecting battery life | Superior thermal mass; maintains more stable temperatures protecting battery chemistry |
| Security Features | 3-5 point locking systems, anti-pick locks, drill-resistant cylinders; easier to breach than brick | Inherently more secure structure; can integrate advanced alarm systems and reinforced doors |
| Fire Resistance | Fire-resistant coatings available; metal won’t combust but can warp under heat | Fully non-combustible masonry construction; superior containment for lithium-ion battery fires |
| Installation & Portability | Flat-pack delivery, self-assembly in 1-2 days; can be relocated if needed | Requires professional construction, planning permission likely needed; permanent structure |
| Cost (approx.) | £800-£2,500 depending on size | £3,000-£8,000+ including foundation and construction |
| Corrosion Warranty | Typically 10-25 years for PVC-coated steel | 50+ years if properly maintained |
The Fire Safety Error of Charging in Communal Corridors
Charging your scooter seems like a simple task, but it carries a hidden and significant risk: fire. The lithium-ion batteries used in most modern scooters are energy-dense, and if they fail, they can lead to a violent, explosive fire that is extremely difficult to extinguish. The common practice of leaving a scooter to charge in the communal hallway of a block of flats is one of the most dangerous mistakes a user can make. A fire in a corridor blocks the primary escape route for you and all your neighbours, turning a convenience into a potential death trap. The scale of this danger is not theoretical; fire technology research documented that in New York City alone in 2023, micromobility battery fires caused 268 reported fires, 150 injuries, and 18 fatalities.
Creating a fire safety system for charging is not optional. This means designating a specific, safe charging location inside your own flat or a fire-resistant outbuilding—never in a shared space. This location must be chosen carefully, following a strict protocol to minimise risk. The core principle is separation: keeping the charging battery away from flammable materials and ensuring it is not in a location that would impede your escape in an emergency.
A safe charging station is more than just a plug socket. It is a carefully planned area designed to contain and alert. The image below illustrates an ideal setup, incorporating multiple layers of safety.
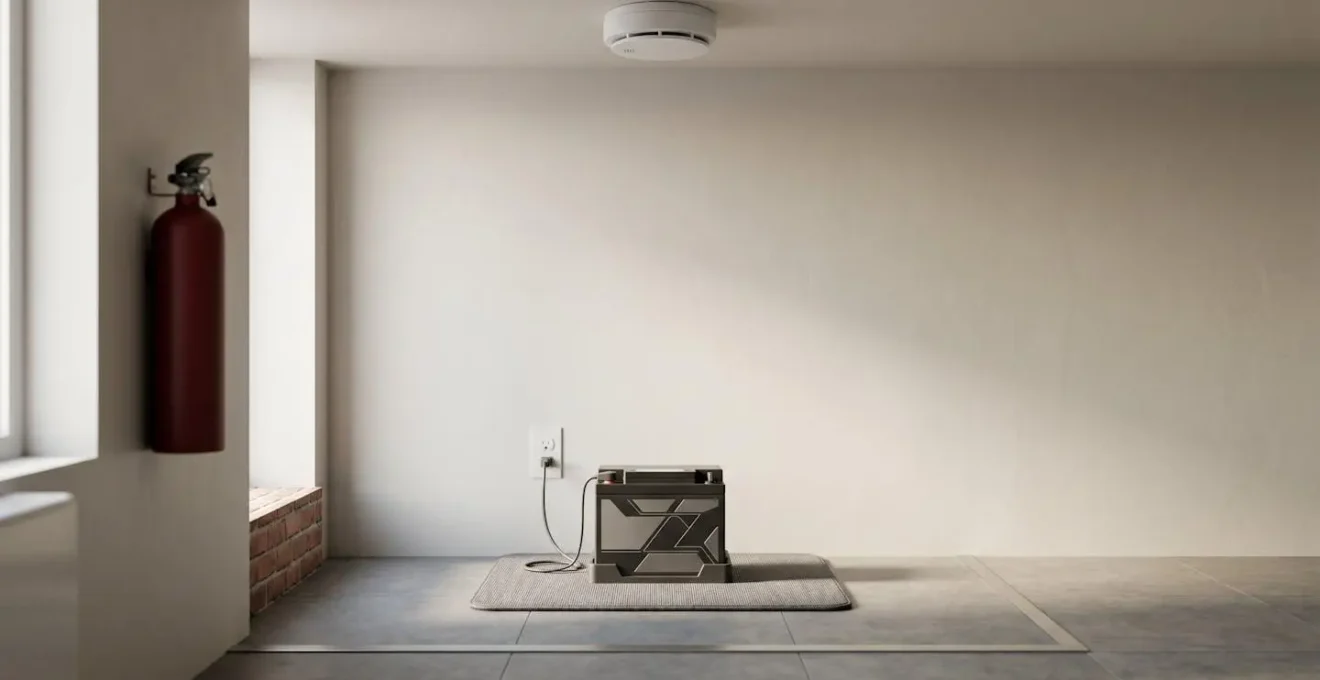
This setup demonstrates key safety principles. The battery is on a non-combustible surface, well away from curtains or furniture. Crucially, a heat alarm is installed on the ceiling above—these are more effective than smoke alarms for lithium-ion fires, which can generate intense heat before producing significant smoke. Having a suitable fire extinguisher nearby is also a critical component. Adhering to a safe charging protocol is one of the most important responsibilities of scooter ownership.
- Never charge in hallways, communal corridors, or near exit routes.
- Use only manufacturer-supplied chargers and certified batteries.
- Create a dedicated charging zone on a non-combustible surface, at least 3 feet from flammable materials.
- Install a heat alarm (not just a smoke detector) in the charging area.
- Charge batteries during waking hours only—never leave charging unattended overnight.
- Unplug the charger immediately once the battery is full.
- If you notice battery swelling, hissing, or unusual heat, evacuate immediately and call 999.
Why Installing a Key Safe Is Crucial for Scooter Users Living Alone?
For those with limited mobility living alone, one of the most frightening scenarios is being unable to get to the door in an emergency. A fall or sudden illness could leave you helpless, while paramedics or family members are locked out, wasting critical time. A key safe is not a mere convenience; it is a vital component of your personal emergency response system. It provides a secure and reliable way for trusted individuals to gain access to your home when you cannot.
The prevalence of mobility challenges highlights the need for such systems. Installing a key safe ensures that in a crisis, the focus is on getting you help, not on breaking down your door. However, the installation and management of a key safe require a strategic approach. It’s not enough to simply screw one to the wall by the front door. The placement and the protocol for sharing the code are just as important as the device itself.
For a scooter user, the key safe must be installed at a height that is reachable from a seated position (typically 36-48 inches high), not at the standard eye-level for a standing person. It should also be placed in a discreet location—visible enough to be found with clear instructions, but not so obvious as to attract unwanted attention. Pairing this with a video doorbell can add another layer of security, allowing you to visually verify who is at the door before providing access instructions. A comprehensive protocol ensures the key safe is a reliable lifeline.
- Position the key safe at a reachable height from a seated position.
- Install it in a discreet but easily describable location (e.g., ‘behind the downspout’).
- Store a laminated emergency info card inside with the key (contacts, allergies, medical conditions).
- Share the code ONLY with trusted family, carers, and registered emergency services.
- Consider pairing with a video doorbell for remote verification.
- Test the lock and update the emergency card every six months.
How to Measure Your Hallway or Shed Before Buying a Scooter?
The single most common and costly mistake new scooter owners make is buying a model that doesn’t fit their home. They might measure the width of their narrowest doorway and assume that if the scooter’s width is less, it will be fine. This overlooks the most critical measurement: the turning radius. A scooter needs far more space to navigate a 90-degree corner in a hallway than its static width suggests. This real-world space requirement is its ‘dynamic footprint’.
Failing to account for this can mean you are left with a scooter that you cannot get into your bathroom, or one that gets stuck trying to get from the living room to the kitchen. As mobility accessibility research highlights, this is a particularly acute problem in older buildings with retrofitted accessibility aids.
According to mobility scooter accessibility research, navigating in restricted spaces—whether in the home or in public spaces and buildings—is a significant challenge for users. While new public buildings are usually designed with accessibility features… the longer length and wider turning radius of mobility scooters may make it difficult to use them even in compliant spaces. This is a greater problem in older buildings which may have had to make compromises in retrofitting accessibility aids. For example, an elevator or lift may be adequate for a wheelchair, but too short for a mobility scooter, highlighting why pre-purchase spatial measurements are absolutely critical to avoid costly mistakes.
Before you even look at scooter models, you must perform a thorough audit of your home’s layout. This involves measuring every part of the route the scooter will take, from the front door to the bedroom and the storage point. This pre-purchase audit will define the maximum size and, crucially, the maximum turning radius of any scooter you can consider. Here is a systematic approach to capturing the essential data:
- Doorway Widths: Measure all doorways at their narrowest point, usually the frame itself.
- Tightest Turn: Identify the tightest corner in your home. Use a tape measure to mark out a full 360-degree circle on the floor to find the maximum turning diameter your space allows. This is your most important constraint.
- Vertical Clearance: Measure door frame heights and any low-hanging obstacles in your storage area.
- Ground Clearance: Identify the highest threshold or carpet edge your scooter will need to cross.
- Simulate the Path: Use painter’s tape to mark the scooter’s ‘dynamic footprint’ on the floor, simulating its path through your main routes.
- Document and Compare: Take photos of your spaces with the tape measure visible, then compare these dimensions against the manufacturer’s specification sheet for any scooter you consider.
Key Takeaways
- True scooter independence relies on building interconnected safety systems, not just buying individual aids.
- Always audit your space before buying: measure the ‘dynamic footprint’ and turning radius, not just static doorway widths.
- Prioritise safety at high-risk points: create dedicated ‘Transfer Zones’ to prevent falls and implement a strict fire safety protocol for battery charging.
- Protect your investment with ‘environmentally resilient’ storage that combats British damp, and ensure you have an emergency access system like a key safe.
Saving Space: Why Under-Floor Lifts Are Better for Family Trips?
Independence shouldn’t end at your front door. Taking your scooter with you on family trips or for days out is a key part of maintaining a full and active life. However, transporting a scooter presents a major logistical challenge: how to get it into the car without sacrificing all of your boot space. For families who need their boot for luggage, shopping, or sports equipment, a traditional boot hoist that places the scooter inside the vehicle is often not a viable option. This is where an under-floor lift, also known as an ‘under-vehicle lift’ or UVL, offers a transformative solution.
Unlike a boot hoist, an under-floor lift is a cassette that is installed beneath the chassis of the vehicle. When activated, a platform extends out from the side and lowers to the ground. You drive the scooter onto the platform, and the lift automatically raises it and retracts it into the sealed cassette under the car. The primary benefit is immediately obvious: your entire boot and all of your interior cabin space remain completely free. This makes it an ideal solution for one-car families or anyone who doesn’t want to choose between bringing their scooter and bringing their luggage.
While the benefits are significant, under-floor lifts represent a much higher level of vehicle modification and cost compared to simpler hoists or portable ramps. The installation is complex and adds considerable weight to the vehicle, which can impact handling and fuel economy. The choice of transport solution is a trade-off between convenience, cost, and impact on the vehicle, as this comparison based on data from mobility equipment specialists shows.
| Criterion | Under-Floor Lift | Boot/Trunk Hoist | Portable Folding Ramp |
|---|---|---|---|
| Interior Space Preserved | Excellent: Scooter stored beneath vehicle floor, zero cabin space used | Poor: Scooter occupies entire trunk/boot area | Good: Scooter can stay in trunk, ramp stows separately |
| Installation Complexity | High: Requires professional installation, vehicle modification, potential chassis reinforcement | Moderate: Bolt-on installation to trunk floor or hitch receiver | Low: No installation, portable solution |
| Vehicle Weight Impact | Significant: Adds 100-200 lbs permanent weight affecting fuel economy and handling | Moderate: Adds 50-100 lbs plus scooter weight when loaded | Minimal: Ramp weighs 20-60 lbs, removed when not in use |
| User Physical Effort Required | Minimal: Automated lift, push-button operation | Low-Moderate: Powered hoist but requires guiding scooter onto platform | High: Must physically push/drive scooter up incline |
| Loading/Unloading Time | 2-4 minutes (automated cycle) | 3-5 minutes (position, secure, hoist) | 1-3 minutes (deploy ramp, drive up) |
| Cost Range | $3,000-$8,000+ installed | $1,500-$4,000 | $200-$800 |
| Vehicle Resale Impact | Mixed: Major asset for disability buyers, potential liability for general market | Neutral: Can be uninstalled and sold separately | None: Fully portable, no vehicle modification |
Car Hoists for Scooters: How to Lift 100kg Without Breaking Your Back?
If an under-floor lift isn’t suitable, a car boot hoist is the most common solution for lifting a heavy scooter into a vehicle. These powered devices do the heavy lifting for you, preventing the back injuries that are almost inevitable when trying to manually lift a scooter. The weight of these machines should not be underestimated; while lightweight travel scooters can be manageable, mobility equipment specifications show a typical mid-size scooter weighs 70-120 lbs (32-54 kg), and heavy-duty models can easily exceed 150 lbs (68 kg).
A hoist system eliminates this manual strain, but it’s not a completely « hands-off » process. Operating it safely requires correct posture and an understanding of the equipment to prevent accidents. You still need to guide the scooter onto the hoist platform and ensure it is properly balanced and secured before activating the lift. The primary ergonomic rule is to stand to the side of the scooter, using one hand to guide it while keeping your back straight and bending at the knees. Never stand directly behind the scooter in case it rolls backwards.
Just as with your home systems, you must also plan for points of failure. What happens if the hoist’s power fails mid-lift? Most quality hoists have a manual override mechanism, such as a hand crank, that allows you to safely lower the scooter. It’s essential to know where this is and to practice using it at least once a year, so you are not left stranded during a real power failure. A regular maintenance routine is key to ensuring the hoist remains a reliable part of your mobility system.
- Pre-Operation Check: Always inspect lifting straps for any signs of fraying or wear before use.
- Correct Posture: Stand to the side, feet shoulder-width apart, and bend at your knees, not your waist, when guiding the scooter.
- Weight Distribution: Ensure the scooter is perfectly centered on the platform before lifting to prevent tipping.
- Emergency Override: Locate and practice using the manual override mechanism so you are prepared for a power failure.
- Annual Maintenance: Lubricate all moving parts, check that mounting bolts are tight, and inspect wiring for damage. Lifting straps should be replaced every 3-5 years.
- Have a Backup Plan: Consider keeping a set of lightweight, portable ramps in the car as a secondary loading method in case of total hoist failure.
By adopting this holistic, system-based approach—from measuring your home correctly to planning for safe transfers, charging, and transport— you transform the challenge of using a scooter into a seamless extension of your independence. To put these principles into practice, your next step should be to conduct a full ‘point of failure’ audit of your own home and travel routines.